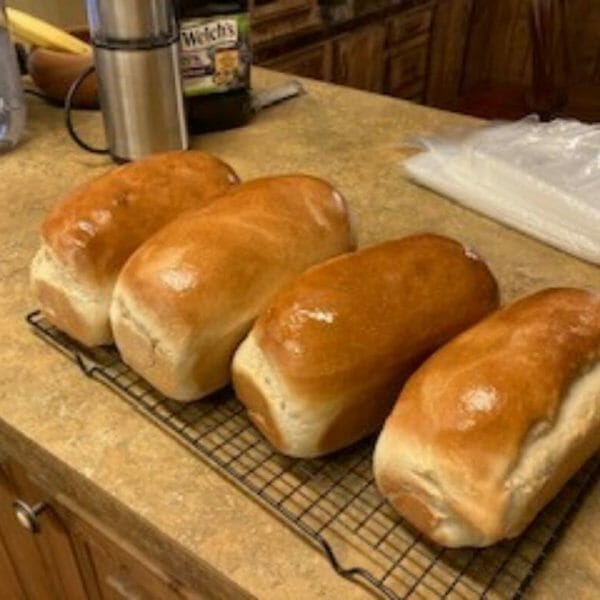
My cousin, Carol, has been an incredible help during our move to the Southwest. Being family, she wouldn’t accept anything for her help with cleaning our new home before we arrived, disposing of boxes, letting us stay overnight in those first few chaotic days, and just overall constant moral support. I needed someone in my life who said several times a week, “You’re doing a really good job.” So it seemed natural yet somehow inadequate to give her a loaf of my homemade Country Crust Bread as soon as I found my loaf pans, Kitchen Aid mixer, and recipe file box.
Recipes
There’s nothing like blessing someone with a dish of homemade food! Check back often for recipes to use for church pot lucks or outreach ministries. Catch funny and poignant stories about food in history and in Karen’s daily life. I’ll also share recipes from the past and how those dishes weave into my historical fiction.
Lite Wheat Dinner Rolls: A Holiday Dinner Must Have

Whenever I ask my family what they want for a holiday dinner, my lite wheat dinner rolls are often near the top of the list.
I guess I have a reputation for making homemade bread. I’ve been making these lite wheat dinner rolls for my family, friends, and church events ever since I was in the 4-H breads project. Somewhere in midlife, I settled on an adaptation of a recipe from a Better Homes and Gardens cookbook.
Tips for making the best Lite Wheat Dinner Rolls
This recipe is based on what we call the rapid-rise method. You mix your yeast with two cups of flour and then have your liquid at a higher temperature. This speeds the rising time, but really not by much. And it’s a bit of an adjustment to remember to have your liquid hotter than you would for the regular method of making bread. However, be careful that you don’t get your milk too hot; otherwise, you’ll kill the yeast. Not good.

If you plan to make bread very often at all, it is worth the small investment to buy a good meat/bread thermometer. Here’s the model of the Taylor TruTemp Thermometer that I use (No, I’m not an affiliate of Amazon so I don’t get a kickback from my recommendation. But I do love the compact, easy to store, and easy to read features of this particular model. It’s a little pricier than other food thermometers, but I believe it’s well worth the price. Tell Santa if he gets it for you for Christmas, you’ll make him some cinnamon rolls instead of cookies!)
Other tips:
Butter gives a better flavor and a tender crumb. But vegetable oil works just as well in this recipe.
One final thought. If you need only a small number of rolls, divide the dough in half. Make 12 dinner rolls and then use the rest to make some cinnamon rolls. You can even cook the cinnamon rolls and then freeze them for Christmas morning. Isn’t that a sweet deal?
Here’s my recipe:

Lite Wheat Dinner Rolls
Ingredients
- 3½ cup all-purpose flour
- 1 cup whole wheat flour
- 1 pkg active dry yeast
- 1 cup milk
- ⅓ cup sugar
- ⅓ cup butter, softened
- 1 teaspoon salt
- 2 eggs
Instructions
- Combine 2 cups of the all-purpose flour, yeast, salt, and sugar in large mixing bowl. Microwave the milk at power 5 for about 1 minute or until milk temperature is between 120-130 degrees. Stir milk before testing the temperature to get an accurate readin
- Pour milk over flour, beating as you add the milk. Beat well. If you are using a heavy-duty mixer, beat on the next to lowest speed for about 1 minute. Add the butter and the eggs, one at a time, beating well after each addition. Add the one cup wheat flour; beat well. Stir in remaining flour until dough forms a ball. If you have a bread hook attachment to your mixer, change beaters at this point.
- Using your dough hook, knead the dough for about 3 minutes on low then turn out on a floured board for the final kneading. If you do not have a dough hook, turn out onto a floured board and knead for about 5-10 minutes or until dough is smooth and has an elastic feel to it. The dough should be slightly sticky.
- Shape into a ball. Place ball into a greased bowl; turn once to grease the surface. Cover and let rise in a warm place till double, about one hour.
- Grease well a 9×13 inch cake pan. Punch dough down. Divide into 24 pieces. Shape dough into rolls by squishing flat between your hands and then drawing the edges toward the middle, making sure there are no creases. Pinch the edges together at the bottom of the roll. Place the roll face down in the pan to grease the top, then turn over, arranging the rolls in six rows of four each. Cover and let rise in a warm place until nearly double, about 30 minutes
- Bake in a 375 degree oven for 15-17 minutes or until golden brown. Turn out on a wire rack. Lightly grease the tops with shortening or butter. Cover with a tea towel until ready to serve so they don’t dry out.
Sugar Free Coconut Cream Pie: A Healthy Holiday Dessert Option

Sugar free coconut cream pie. It’s one of Preacher Creature’s favorites.
Because my husband is diabetic, I’m sensitive to the need for healthy and low sugar options for church functions, so I often volunteer to bring a salad or some sugar free dessert. I’m sure to make and several other people happy if I make a sugar free Coconut Cream Pie. For that reason, I often keep a bag of coconut and a box of sugar free vanilla pudding on hand so I’m ready for any event.
Calling this sugar free is misleading. I do use sweetened coconut. I have yet to try unsweetened coconut. That might work to stir into the pudding mix but I think that might be a bit blah for the coconut you put on top of the pie. Still, between the sugar free pudding mix, the three eggs, and using Splenda in the meringue, my low sugar coconut cream pie ends up to be a fairly healthy dessert option.
I also find that using Splenda in meringue makes the meringue turn a strange yellow color when you try to brown the meringue. Usually, when I make meringue, I will use 2 tablespoons Splenda and 2 tablespoon sugar. But, with coconut cream pie, the coconut hides the meringue and you don’t get that weird color.
If you are looking for a coconut cream pie recipe that doesn’t call for a sugar substitute or use a pre-package mix, try my recipe for Coconut Cream Pie that uses a homemade pudding base.
Sugar Free Coconut Cream Pie
Ingredients
- One baked single crust 9 or 10-inch pastry shell
- 1 small box cook and serve sugar free vanilla pudding mix
- 2 cups milk
- 3 eggs
- ½ cup coconut
- ½ tsp vanilla
- ¼ tsp cream of tartar
- ¼ cup Splenda
Instructions
Preheat oven to 350 degrees. Separate the eggs. Beat the egg yolks. Using 2 cups milk, cook the pudding mix according to package directions. When the pudding mix comes to a boil, spoon about ¼ cup of the pudding, spoonful by spoonful into the egg yolks and mix well after each spoonful. Pour the egg yolk mixture into the rest of the pudding and boil on medium low heat for three minutes. Remove from heat. Add and stir in ½ coconut and the vanilla.
Pour into prebaked pie shell. Whip the egg white until they reach soft peak stage. Add the cream of tartar and the Splenda, continuing to beat as you add. Beat until meringue reaches stiff peaks. Do NOT overbeat.
Spoon and smooth meringue over the pudding mix. Sprinkle the ¼ cup coconut on top. Bake the pie for about ten minutes or until the coconut starts to brown. Watch carefully. After ten minutes, you can turn your broiler on for 30-60 seconds. Watch VERY carefully. Fifteen seconds under the broiler can make a huge difference.
Zucchini Santa Fe: What To Do With Another Zucchini
Oh no! Did you just find another zucchini lurking in your garden?

Every year, a table in our church Fellowship Hall has a varied display of garden produce, including zucchini, lots of zucchini. This prolific plant is, like Preacher Creature acerbically says, “the gift that keeps on giving.” He doesn’t like zucchini.
I take that back. He will tolerate zucchini, depending on how I fix it. And so I’m always on the lookout for new recipes. After all, I can only make so much zucchini bread. Have you ever noticed that zucchini bread really doesn’t take that much zucchini?
Try this new recipe
[Read more…]- 1
- 2
- 3
- …
- 9
- Next Page »